SITE HELP - Internal Image Linking
OTHER SITE HELP
For a list of other HELP topics, including an introduction to posting and computing terms, refer to this Index Thread
INTRODUCTION
Previously, I covered the most basic method of posting an image via this site's Create Content - Photo facility. The thread for these instructions can be found by clicking HERE.
I also covered the first of three alternatives for posting multiple images or embedding one or more images into a new post in an existing thread HERE. This first option deployed the use of a REMOTE HOST to store your image/s and then linking to them within your post on this site.
Now I'll move onto the second option for situations where you wish to:
This second option is called INTERNAL IMAGE LINKING.
The advantages of this method are:
With this method, you:
Here is an example of where this has been used to upload an image to this site and then display (imbed) it in an existing THREAD new post .
PROCEDURE
NOTE - If you are going to post an image or images, and follow these instructions as you do it, then it suggested you open two sessions of Fishwrecked and display this post in one, whilst you perform the posting in the other. I find it easier to open two separate browser sessions rather than two tabs within one session. Then you can use ALT/TAB to toggle (swap) between them.
Upload Your Image/s To This Site
This is essentially the same procedure as documented in the thread SITE HELP - Posting Images Via New Thread, with one difference - you don't add text because you'll be doing that in the new THREAD or existing THREAD new post that you'll be adding your image/s to.
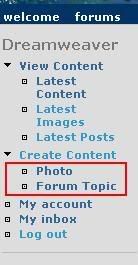
STEP 1 - On the LHS of the site is a Create Content item, if this doesn't show two items (Photo and Forum Topic), click on this to display these:
STEP 2 - Click on the Photo item - the following screen is displayed:
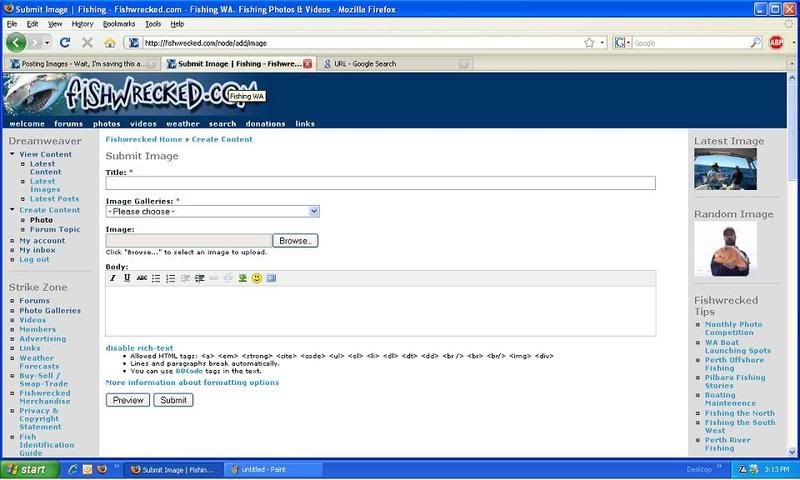
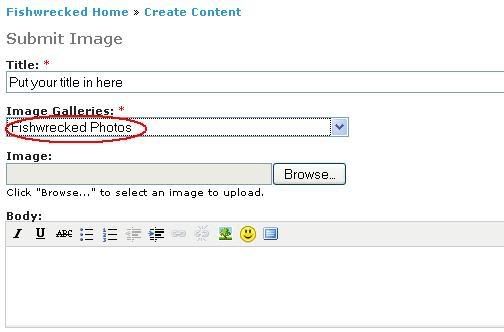
Complete the Submit Image screen:
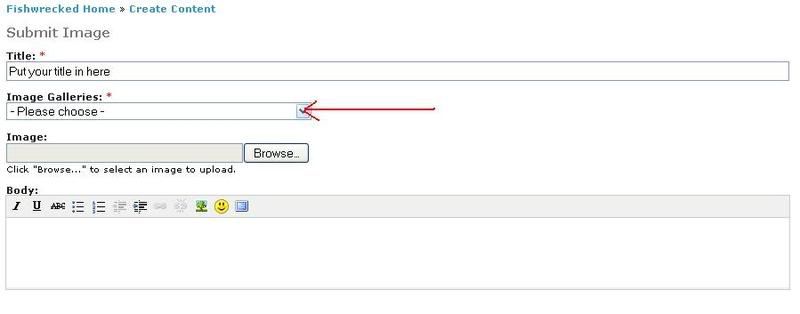
STEP 3 - TITLE - Type your desired title in the box below where it says Title
STEP 4 - GALLERY
- Select an image gallery - this tell the site software where to store your image on this site. Click where indicated on the following diagram:
- A drop down list will appear:
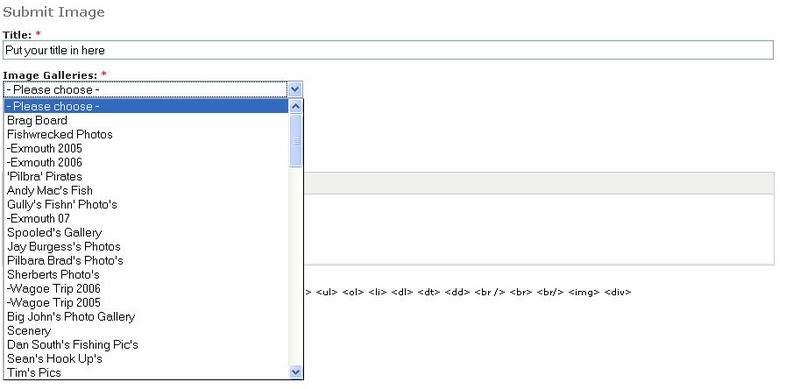
Unless you have had Adam set you up with your own photo gallery (you'll need to send him a PM request), you'll need to select one of the general galleries - for example fishwrecked photos:

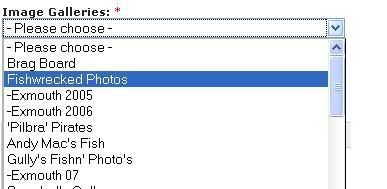
Simply place your cursor over the desired gallery and click on it. The Images Gallery field will now be populated (fill in) with desired glallery:
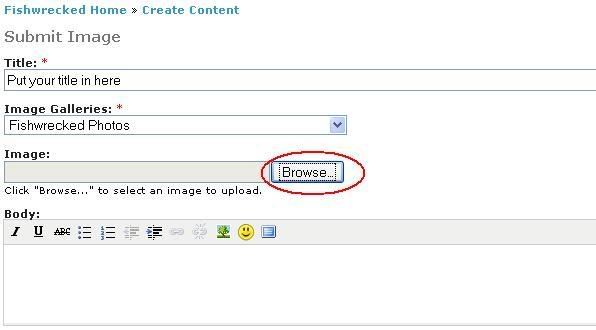
STEP 5 - SELECT IMAGE TO UPLOAD
- Click on the Browse button to the right hand side of the Image field:
- Assuming you are using a Microsoft Operating System you will see the following dialogue (screen):
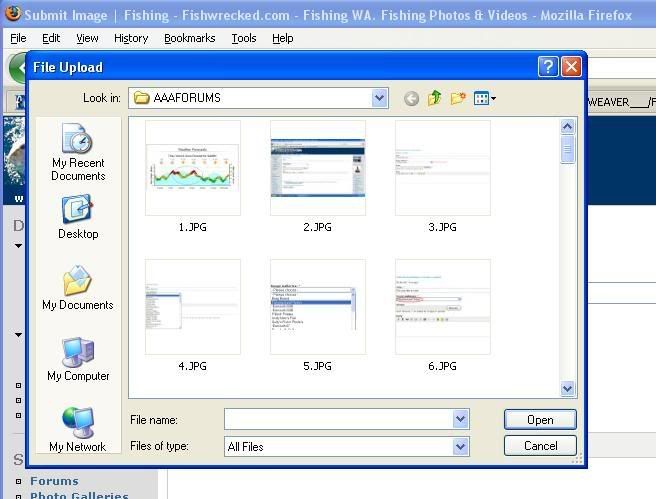
- Simply browse to your desired picture, click on the desired item (see note below) to populate the dialogue file name field with the desired image, then click on the Open button within the dialogue - the dialogue will dissapear and the Image field in this site's Submit Image screen will be populated with the location of the image on your PC:
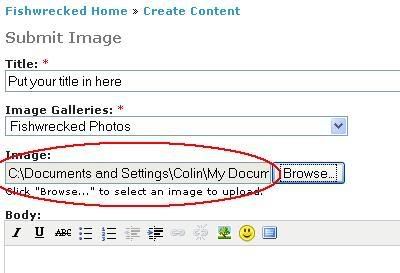
NOTE - What will be displayed in your File Upload dialogue, will depend on how you have the directory of the folder that contains your image set up. Whether you display details, thumbnails (small images) etc.
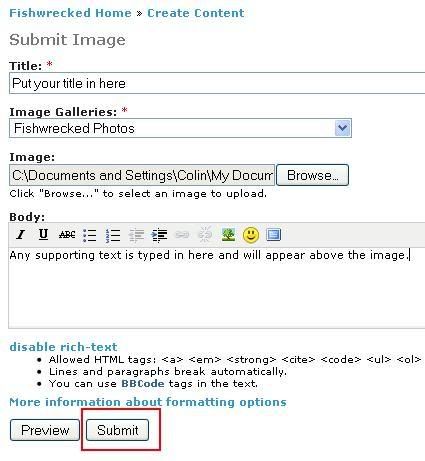
STEP 6 - POST YOUR IMAGE - Click on Submit button :
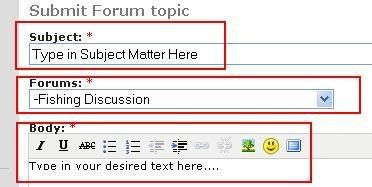
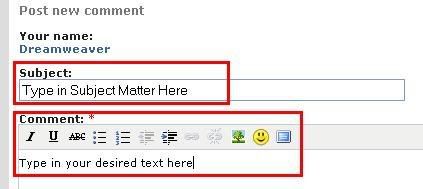
STEP 7 - START YOUR TEXT POST :
Either by using this site's Create Content - Forum Topic if intend to start a new THREAD, or click on the existing Forum Topic or Image THREAD if you intend to add a post.
NOTE - For demonstration purposes, this procedure adds one image to a post.
STEP 8 - COMPLETE THE APPROPRIATE POST FIELDS:
Now we start the process of linking to your previously posted image/s.
STEP 9 - OPEN ANOTHER BROWSER SESSION - Again, I prefer to open a completely separate session, rather than a tab within the same session as you can use the ALT/TAB keys to toggle between the two.
STEP 10 - DISPLAY THE IMAGE YOU WISH TO LINK TO - From this site select your desired image post.
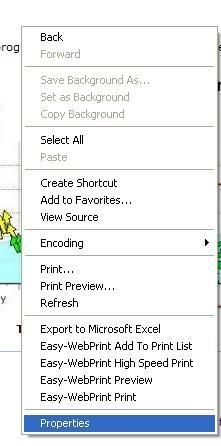
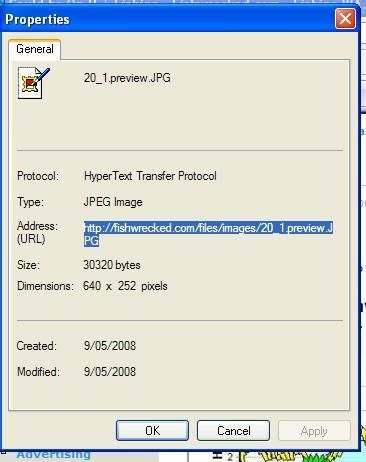
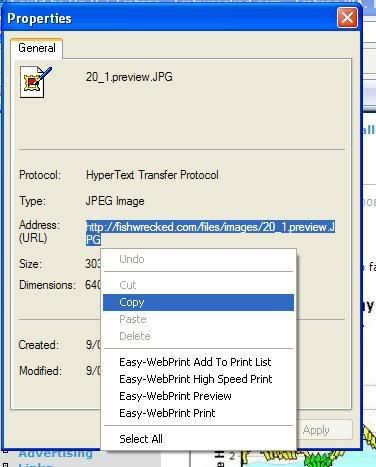
STEP 11 - OBTAIN THE IMAGE PATH.
This is the address of the image on this site, that is, where it is stored when you previously posted it :
FIREFOX: (scroll down slightly for Internet Explorer procedures)
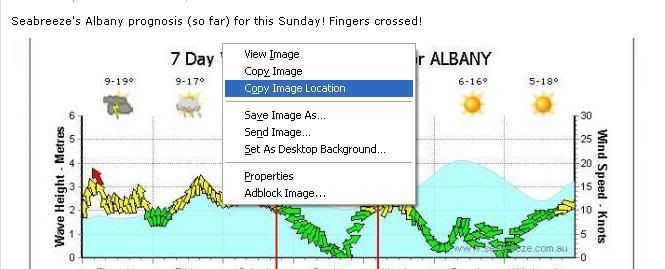
INTERNET EXPLORER:
Now you know why I use Firefox!
In both cases we have now copied the address of the image. We will now paste that copied image address into the Body (new THREAD) or Content (existing post) field, just below our text in the other browser session.
STEP 12 - PASTE THE IMAGE ADDRESS.
Paste the the address in either the Body or Content fields below your text (right mouse click and paste or simultaneous use of the CNTL and V keys) - it will look like this:

STEP 13 - FORMAT THE IMAGE ADDRESS.
We need to add some code either side of the address - this basically tells the sight to display the content at the copied address as an image (IMG).
Add [IMG]at the beginning of the copied image address and [/IMG] at the end of the address. NOTE that these are different!
Now your code that will display the image should look like this:

IMPORTANT - Make sure there are no spaces between the IMG tags and the code, otherwise your image/s will not display!
There are parameters and sub parameters you can add into this code, but that I'll leave for another topic.
To add multiple pictures, simply repeat from Step 10 onwards.
STEP 14 - PREVIEW AND OR SUBMIT.
When you have finished with your text, pasting the address of the image/s and adding the IMG tags at either end of the image address, all that remains to be done is preview and/or submit your post! .
JOB DONE!!
Soon to be de "dreamweaver" ed!


Dreamweaver
Posts: 4688
Date Joined: 01/12/07
Now completed - PHEW!
OK Guys and Girls, this procedure is completed.
Terry - thanks for the telephone call and coming to my aid on that 'road block' this morning LOL!
Colin Molloy
(Colin 2 - Co-founding member of the prestigious Colin Club)
Soon to be de "dreamweaver" ed!
cuthbad
Posts: 1266
Date Joined: 22/04/09
Great post! thanks for the
Great post! thanks for the help I finally get it
bod
Posts: 2321
Date Joined: 03/05/06
bloody hell
onya photobucket!!