DIY Rod Racks
Hi crew, I just moved into my new place and realy needed some place for my rods to go. So i headed down to bunnings and bought a few planks of pine after looking online for some ideas.
Trying to keep it simple i got the materials and tools i needed togeather.
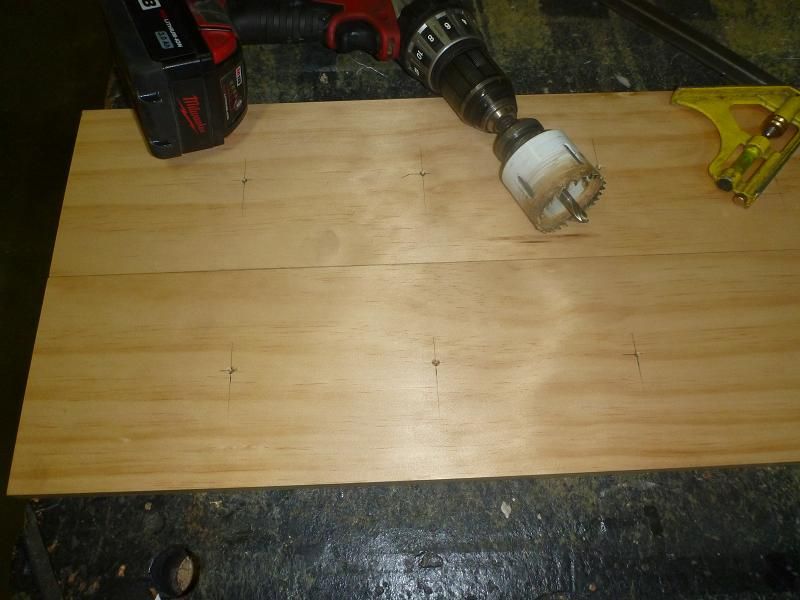
After working out the sizes , I cut the pieces required and started to drill the holes for the rod buts
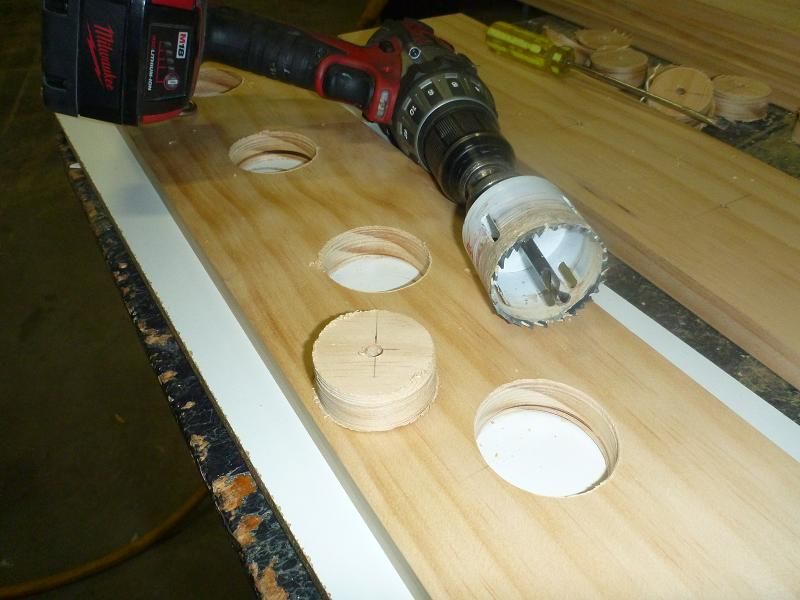
I then used a smaller hole saw for the top section.
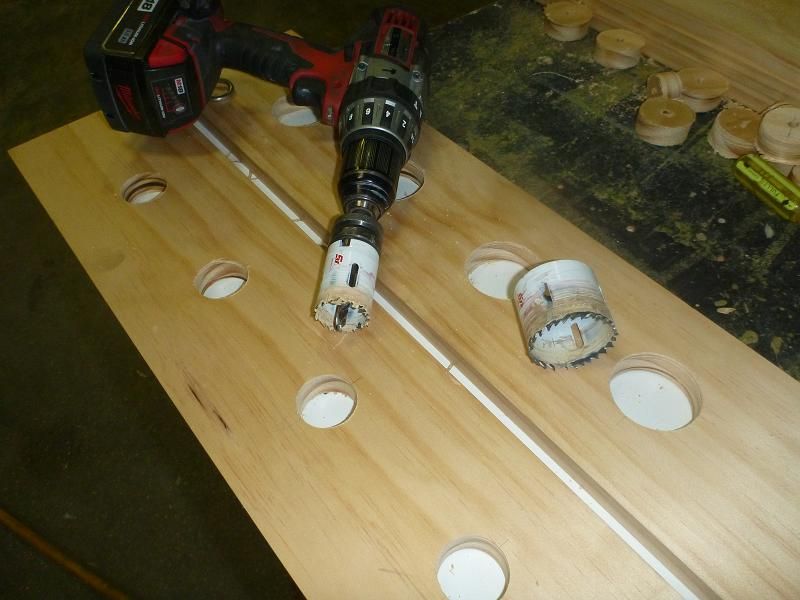
Because most of my beach rods are 2 piece i used a spade bit to drill holes inbetween to take the top sections or the rod's
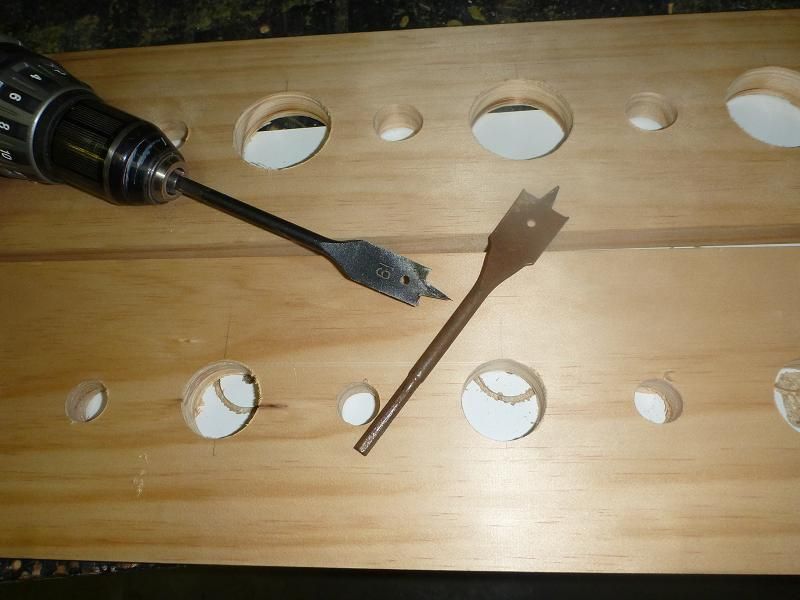
By drilling the holes in the centre of the plank alowed me to cut them down the middle creating the bits to make two racks.
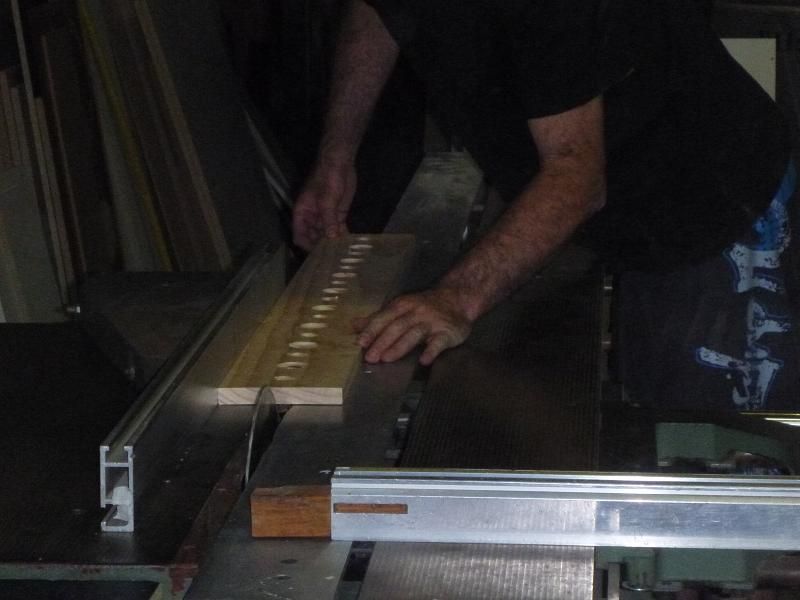
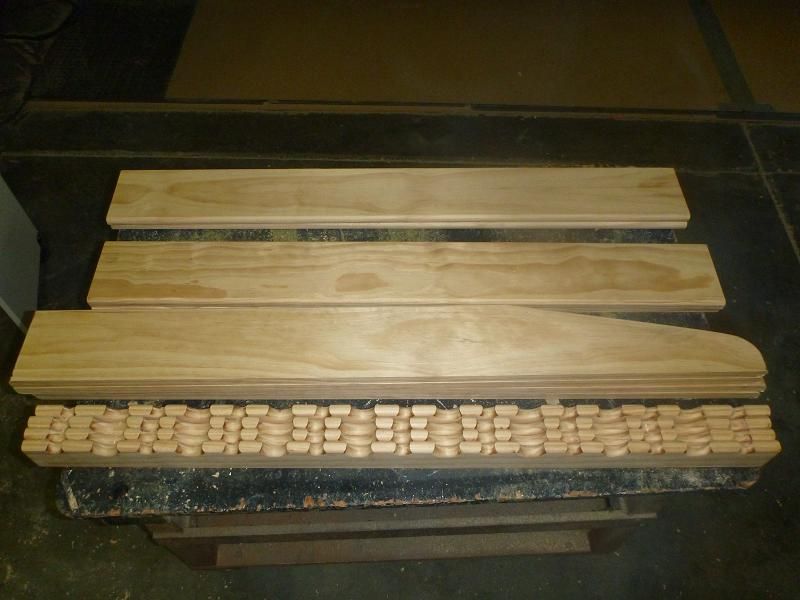
All the bits ready to assemble after rounding the edges with a router and a bit of sanding.
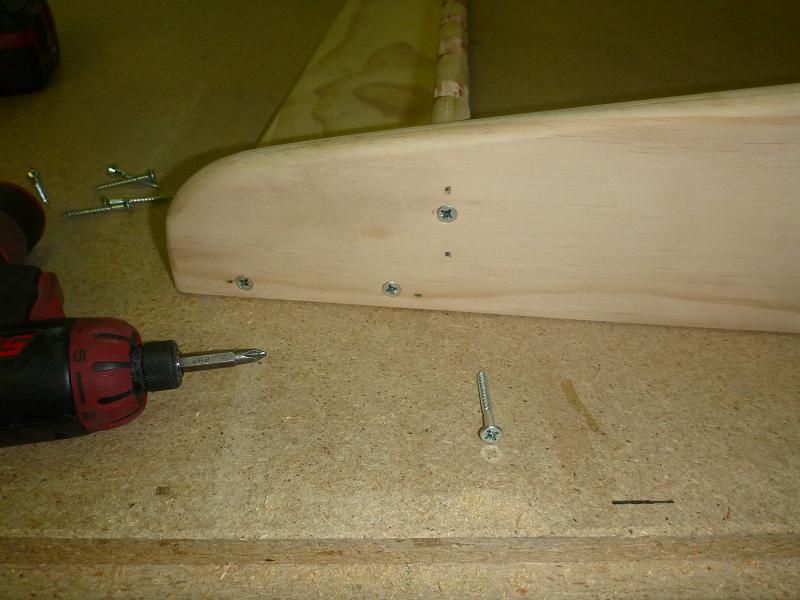
I used a nail gun to pin the frames togeather and the screwed them up tight.
A bit of putty in the nail holes and some more sanding then a coulpe coats of laquer mixed with stain .
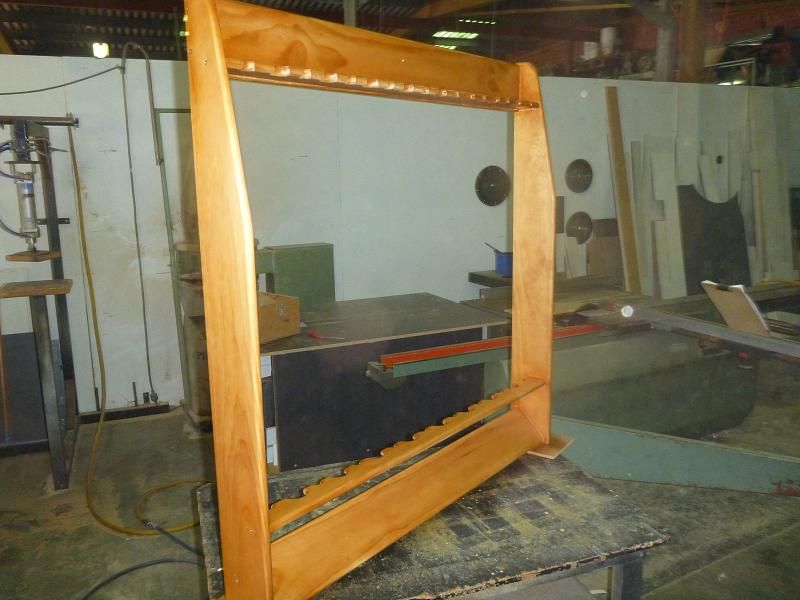
The final product. Only problem is, I think i should have made another one ( some rods got left out ) Total cost = $50.00 plus time.
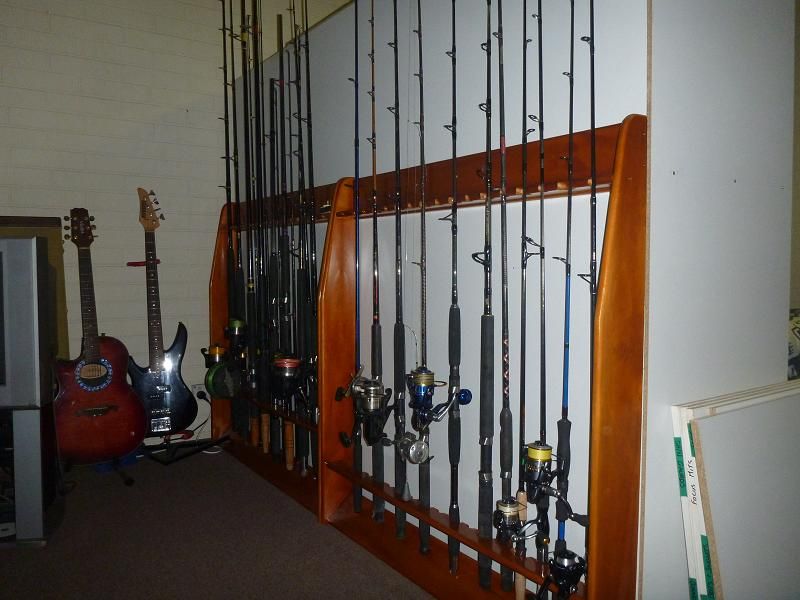
Cheers Grant


drifta
Posts: 106
Date Joined: 15/01/12
Quality job they look great
Quality job they look great
- Brett
cuthbad
Posts: 1266
Date Joined: 22/04/09
great job mate looks good!
great job mate looks good!
crezz
Posts: 695
Date Joined: 12/03/12
fair collection of gear
fair collection of gear there, nice job they look awesome
sea-kem
Posts: 15209
Date Joined: 30/11/09
Nice work there Grant. Got
Nice work there Grant. Got some nice bling in there as well.
Love the West!
chris raff
Posts: 3257
Date Joined: 09/02/10
Looks great , good
Looks great , good workmanship and the finish come up treat ..
“Intelligence is like a four-wheel drive. It only allows you to get stuck in more remote places.”
fisho-ron
Posts: 2539
Date Joined: 26/09/09
great job mate, looks like
great job mate, looks like you got all the gear to do it right as well.
give me a welder anyday!!
milsey
Posts: 1462
Date Joined: 22/08/07
Look good mate. Must be nice
Look good mate. Must be nice having a workshop, Dont think i would ever get out if i had one tho haha.
WADRay
Posts: 301
Date Joined: 20/12/09
Awesome job.how long did it
Awesome job.
how long did it take? Are they stable on the legs? How heavy are they to move about and what size timber did you use?
might have to take a leaf out of your book here
big john
Posts: 8775
Date Joined: 20/07/06
Nice work
Nice work Grantarctic, could be some coin to be made IMO.
WA based manufacturer and supplier of premium leadhead jigs, fligs, bucktail jigs, 'bulletproof' soft plastic jig heads and XOS bullet jig heads.
Jigs available online in my web store!
catchalittle
Posts: 1875
Date Joined: 04/09/08
Alway nice when you make
Alway nice when you make something yourself looks really good great you might get a few orders from a few of the members
Nathan
grantarctic1
Posts: 2546
Date Joined: 03/03/11
Thanks guy's
Thanks for the great comments guys,
I'm lucky to share a factory with a mate who has a pannel saw, wich makes things easy to cut . My first trade was a cabinet maker and as most of you know i am also a welder. Combine the two trades and there is not much i won't try to make myself.
WADRay , they took about 5 hours with the tools available, but you could do it all with hand tools as i did ( except the cut with the saw ) ( you could use a good hand saw or a jig saw to do this part )
The timber came from bunnings ( 5 lengths of pine = 2.4m long and 160mm wide = $10 each length ) So i cut each length in half to get 1.2m bits.
So the racks ended up aprox 1.2m tall x 1.2m wide. The main problem was to get the pieces just right so the rods stayed in the right place ( i clamped the bits in place and put some rods in as a trial until i got them right)
The bottom plank is set at 45 degrees and this puts a slight preasure on the rod but to make it stand up . I made them at different hights on each rack so rods with longer and shorter buts would fit with the reels on them ( I looked at google images and found a couple threads about how they are made )
The One i saw online had feet on the bottom to help with stability, you can also put them back to back as a free standing set ( like what you see in some tackle stores ) Mine are actualy screwed to the cupboard behind them and cannot move . They weigh hardly anything being pine , when i laqured them i moved them around with 2 fingers .
Cheers Grant .
hlokk
Posts: 4293
Date Joined: 04/04/08
Nice looking racks there
Nice looking racks there Grant. I like the splitting after drilling. Might have taken me a bit of frustration trying to figure that one out for a while :p
i have the same drill, so I was thinking "wait, is this an old pic of mine I don't remember uploading" :p
For the rounding of the corners, what kind of sander did you use? I was just thinking that you could run a router round the edges for an interesting finish (either before or after). I originally was thinking that to create the edges cause I'd get lazy sanding it rounded :p
grantarctic1
Posts: 2546
Date Joined: 03/03/11
Great drill
It's a great drill, just about spaps my wrist off if the bit jams .
I used a small drum sander( you can buy at most hardware shops ) in the drill to clean the edges of the holes. Then i used a small router with a half round cutter. I ran it on both sides to round the edges. The cutter hase a small bearing to guide it , so no need for a template .
the sides of the rack were cut with a jigsaw and cleaned up with a belt sander to get a nice clean shape. Yeah i usualy cut ,shape and sand all pieces before assembly , then just a light sand by hand before applying the laquer .
You could make a template for the cut outs and pretty much do the whole job with a router , i just did it this way cause i wasnt quite sure what i wanted and made it up as i went along .
I'd like to make some out of Starboard and have the bits cut by CNC . Now they would look great, but cost quite a bit more in the end .
hlokk
Posts: 4293
Date Joined: 04/04/08
The router bit with the
The router bit with the bearing was the exact one I was thinking of. Stuff doing the whole thing by router :/
Snags
Posts: 558
Date Joined: 07/05/09
Great job!Looks mint
Great job!
Looks mint
pale ale
Posts: 1755
Date Joined: 02/01/10
I knocked up a rod storage
I knocked up a rod storage solution out of some old scaffold planks...
grantarctic1
Posts: 2546
Date Joined: 03/03/11
Nice
Nice mate, Like me it didn't take long to fill it up with rods
pale ale
Posts: 1755
Date Joined: 02/01/10
Yeah, cant fit the popping
Yeah, cant fit the popping and surf rods in cos they are too tall.
Since I made it a few months ago, I now have bought / found a few more rods. Need to build another one.
Pilbra Dave
Posts: 194
Date Joined: 30/09/11
Very nice job, Looks better
Very nice job, Looks better than mine and I took the lazy path and just brought it
If you ain't Fishin you ain't Livin
Justin M
Posts: 1207
Date Joined: 14/01/13
What can I say that hasn't
What can I say that hasn't already been said...that's quality. Don't have anywhere near the amount of rods do but you've inspired me to make one of my own. Always have had issues storing rods at my house. That would be just perfect.
Joodles
Posts: 362
Date Joined: 19/11/10
Mintox!
Mintox!
r.gates
Posts: 573
Date Joined: 15/11/10
Nice work, Grant
Sure came up a treat, and it must make you feel good about making it yourself.
I don't think you've got enough rods and reels, though
rusty...
If life is boring, you must be doing it wrong!